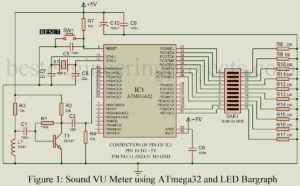
A Volume Unit (VU) meter is a standard device that represents the signal level in audio equipment. This project “VU Meter Circuit using ATmega32” makes the representation process much easier since it avoids the use of any physical medium to establish the connection between the audio equipment or audio source and the circuit of the project. This way we can eliminate the hassle of using more components. It uses a bar graph LED for a visual representation of the audio. ATmega32 is an 8-bit AVR (Alf and Vegard’s RISC processor,…
Read MoreAutomatic Fence Lighting with Alarm
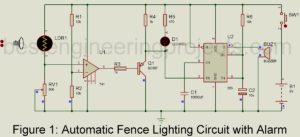
Today, in this article we are going to teach you how to make an automatic fence lighting circuit with an alarm using op-amp 741 and timer IC 555. Fence lighting is used for security purposes and can be used at various places like door alarms, pathway alarms, etc. where monitoring is required. Various types of fence lighting circuits are already available over the internet but the problem with that circuits is they required high precision alignment. To overcome this problem, we designed a very sensitive automatic fence lighting circuit. We…
Read MoreLaser Based Communication Link
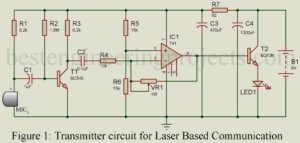
Communication is an essential part of our daily life. The project; “Laser-Based Communication Link” allows people at a distance of around 500 meters to communicate wirelessly through a laser. Various other laser-based projects posted on bestengineeringprojects.com are:- (a) Speech Communication using Laser (b) Mini Laser Turret (c) Laser Voice Transmitter Circuit The project unlike other wireless media uses laser light from the transmitter torch as a carrier instead of RF signals used in the conventional system. At the receiver end, the phototransistor should be aligned in a line of sight position…
Read More50+ Verified Electronics Projects with PCB Layout
Verified Electronics Projects: Those practicing the art of engineering are concerned with numbers in all phases of their work. One area where the numbers become overwhelming is in the area of electronic projects and their parts. Although the integrated circuit (IC) has been a boon to the electronics engineers/hobbyists, the sheer number of parts almost requires the user of the electronic project to have research assistance as an associate, to be sure all electronic projects are available have been considered for use. Valuable time is often spent poring over the…
Read MoreMotor Controller Circuit for Washing Machine
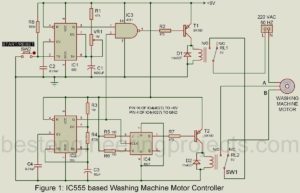
Washing machines have been an important part of our daily life. But, the issues we have to deal with in a few months of using them make it more difficult. Previously, we had already posted the Automatic Washing Machine control circuit. It is because most of the washing machines have a single-phase motor incorporated in the system and the timing and direction of the motor are controlled by an external mechanical switch which gets worn out so easily and is not economical on the other hand. And, the project “Motor…
Read MoreInverting Operational Amplifier with Voltage Shunt Feedback
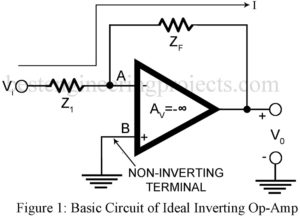
The ideal inverting operational amplifier with voltage shunt feedback from output terminal to the inverting input terminal feedback impedance Zf and with non-inverting terminal grounded configuration is shown is figure 1. 25+ verified electronics projects using op-amp 741. Description Inverting Operational Amplifier with Voltage Shunt Feedback This forms the basic inverting op-amp. It is “Inverting” because our signal input comes to the “-” input, and there has the opposite sign to the output. The feedback arrangement used here forms the voltage shunt feedback. Hence as per theory of feedback amplifiers,…
Read MoreMultiplexed 4 LCD Display using Arduino UNO
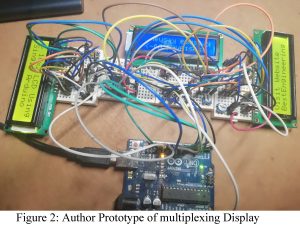
Liquid Crystal Displays (LCD) are activated by an AC signal across s selected display segment; this feature is included in the LCD module itself. In addition to the standard data input, there is also a display frequency input terminal. The circuit “Multiplexed 4 LCD Display using Arduino UNO” can drive most LCD display. This circuit is used in auto dash board displays, panel meter, wall and table clocks, calculator. In this article we are going to show, how to make 16×8 display using four 16×2 display by using common data…
Read MoreCascading of Amplifier Stages
What is Cascading of Amplifier Stages? A single stage of amplifier can provide only a limited current gain or voltage gain. Most of the applications require much higher gain. Hence, we usually use several amplifier stages connected in cascade i.e. connected such that the output of one stage becomes the input to the next stage. Thus, a multistage amplifier or cascade amplifier may provide a higher voltage gain or current gain. Cascading of amplifier stages is usually done to increase the total gain of the amplifier. However, sometimes cascading is…
Read MoreSound Level Meter Circuit using Arduino
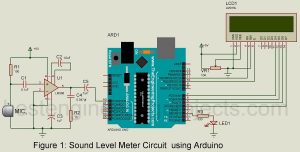
The circuit posted here is of sound level meter using arduino uno board, microphone, Amplifier section and LCD module. The basic function of this project is to measure the intensity of sound and display the result in LCD module. This project can be used in any small closed room like living room, class room etc. The result of sound level is display in LCD module in decibel unit. Here, we had used normal microphone despite of any expensive microphone or sensor. We had already built a sound level meter using…
Read MoreArduino Based Car Reverse Alarm
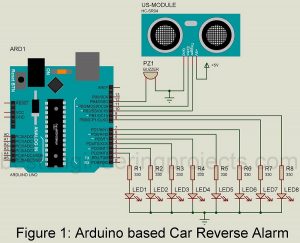
Arduino Based Car Reverse Alarm: We prefer to stay alert than to face the consequences as the result of our ignorance. They say, ‘Prevention is better than cure’ and this project; “Car Reversing alarm” serves us the right purpose. It is designed such that the device sounds an alarm as individual reverses a car for parking in a specific location and it detects any sort of obstacles there, that may create unwanted troubles. The device outputs audible sound wave as well as a visual indication to make the individual aware…
Read More