Today, we are going to show you how to make an Arduino-based Bluetooth Controlled Car. Previously we had already posted various types of robots like Arduino Gesture Controlled Robot, Dual Mode Robot, Arduino, and RF controlled Robot.
The difference between previously posted robot projects and Arduino-based Bluetooth Controlled Car is, unlike others, that it does not require special types of control circuits. It can be controlled using any smartphone using the software. The best part of the project Arduino-based Bluetooth Controlled Car is you can wire it within an hour.
Now let’s discuss components used in Arduino Based Bluetooth Controlled robots. It is divided into two main sections i.e. hardware parts and software parts.
Hardware Used:
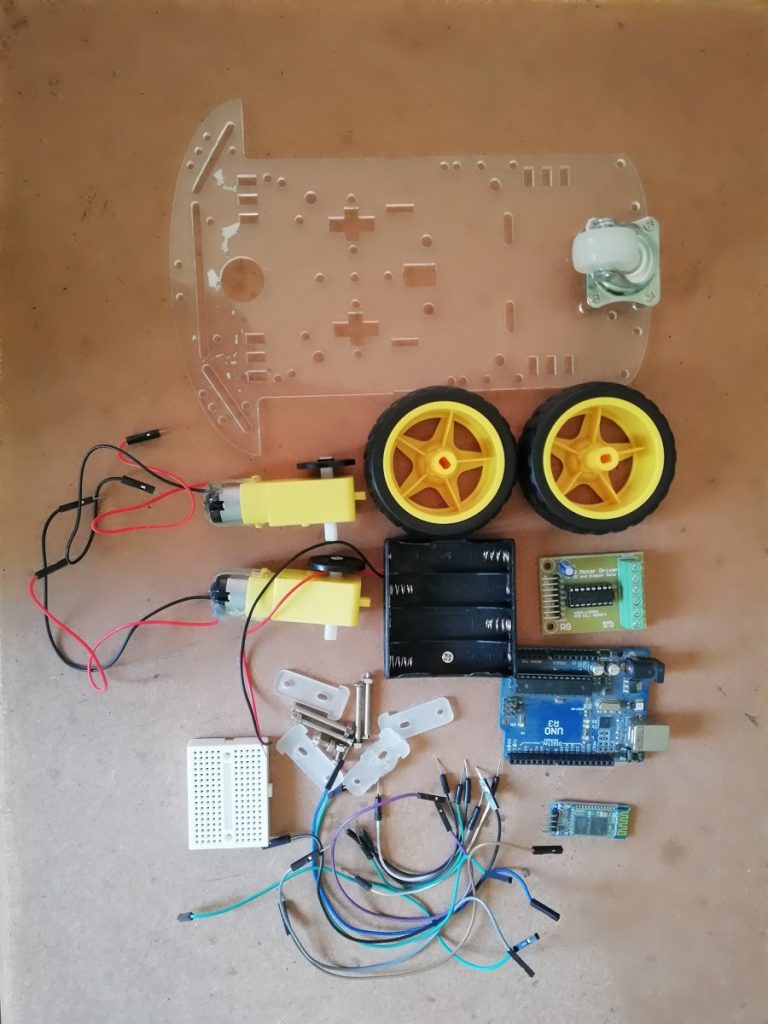
- Arduino Uno Board
- Bluetooth Module (HC-06)
- Motor Driver Module (L293D)
- 4 AA Battery Pack
- Chassis
- Free Wheeler
- Few Jumper as required
 Figure: Bluetooth Controlled Car Components
Software Used:
- Arduino Bluetooth Controller (Can be downloaded from Google Play Store)
- Arduino Software Code (Can be downloaded from the below link)
Before talking about construction and source code let’s discuss the components used:
Arduino Uno Board: As we all know that Arduino is an open-source device, it is flexible and much easier to use because it has a dedicated analog pin, digital pin, regulated power supply, etc. This day Arduino platform is the most popular one because it is best for anymore who shows a keen interest in creative projects or interactive innovations.
Bluetooth Module: The Bluetooth module we are using here is HC-06. The features of this module are listed below.
- A wireless transceiver i.e. single module is used to transmitter and receiver signal.
- In-built 2.4GHz antenna.
- 8Mbit flash external memory
- Low power consumption and low-cost device
- HCI Port can also be used in SMD
Motors: The motor we are using here is a 6V type DC gear motor. The main purpose of using a gear motor is to produce extra torque.
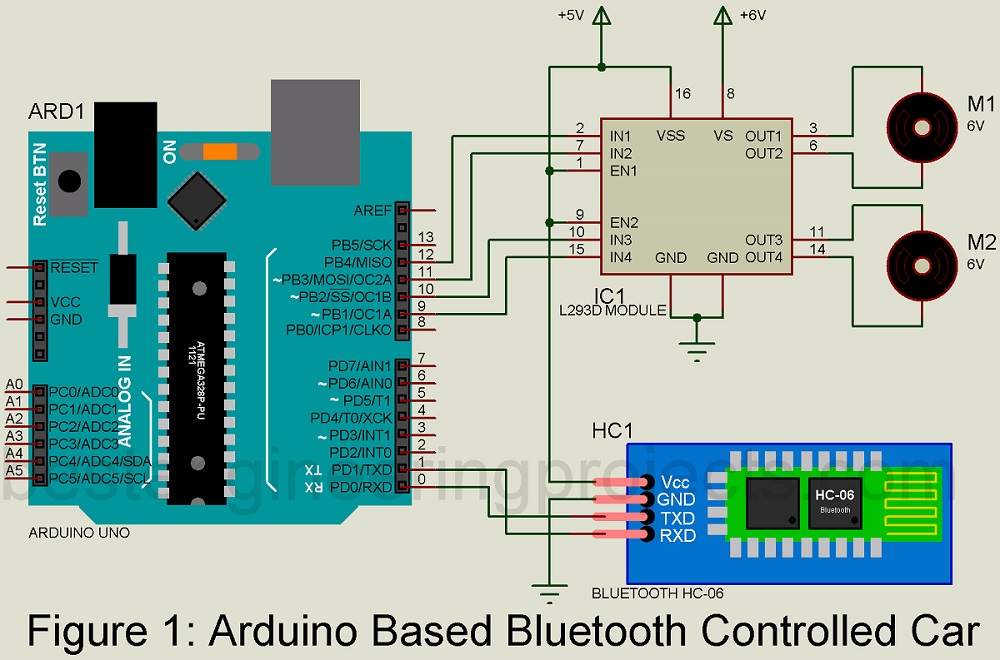
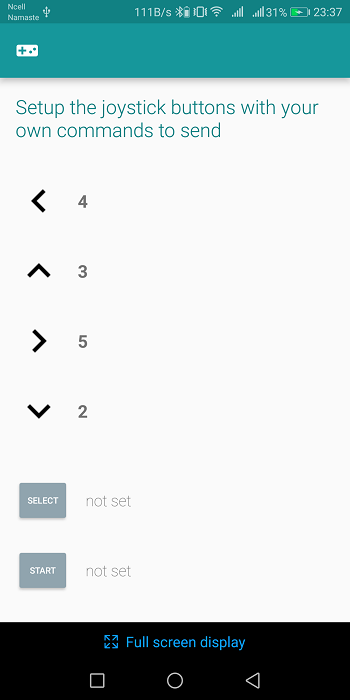
The circuit of the Arduino-based Bluetooth Controlled Car is shown in figure 1. In this project, we assume that the addresses of Bluetooth and android are identical. When any of the data is sent i.e. 1, 2, 3, 4, and 5 from the mobile. Then the data output obtained from pin D9 through D12 of Arduino uno board becomes high.
Now, to drive both the motors M1 and M2 these Arduino outputs are passed as inputs to IN1 through IN4 of the L293D motor driver Module as shown in the circuit diagram. A1 and A2, B1 and B2 drive motor M1 and M2 respectively. To get permanent to enable output at the end, enable pins EN1 and EN2 are connected to Vcc.
You can directly download the source code of Arduino based Bluetooth-controlled car from the link below. Arduino IDE software is used to program Arduino uno board.
|
1 2 3 4 5 6 7 8 9 10 11 12 13 14 15 16 17 18 19 20 21 22 23 24 25 26 27 28 29 30 31 32 33 34 35 36 37 38 39 40 41 42 43 44 45 46 47 48 49 50 51 52 53 54 55 56 57 58 59 60 61 62 63 64 65 66 67 68 69 70 71 72 73 74 75 76 77 78 79 80 81 82 83 84 85 86 87 88 89 90 91 92 93 94 95 96 97 98 99 100 101 102 |
int state; int flag=0; void stops(); void forward(); void left(); void right(); void back(); void setup() { pinMode(12,OUTPUT); pinMode(11,OUTPUT); pinMode(9,OUTPUT); pinMode(10,OUTPUT); Serial.begin(9600); // Set baud rate to 9600bps } void loop() { if(Serial.available() > 0) // Ckeck wether command is received or not { state = Serial.read(); //assign the value of bluetooth to state variable Serial.println(state); //print the value of state in serial monitor flag=0; } if (state == '1') // Comparing command from user { stops();//call function stops if(flag == 0){ Serial.println("Stop"); flag=1; } } else if (state == '2') { forward(); //call function forward if(flag == 0) { Serial.println("Forward"); flag=1; } } else if (state == '3') { back(); //call function back if(flag == 0) { Serial.println("Backward"); flag=1; } } else if (state == '4') { left(); //call function left if(flag == 0) { Serial.println("Left"); flag=1; } } else if (state == '5') { right(); //call function right if(flag == 0) { Serial.println("Right"); flag=1; } } } void forward() // Forward functiom { digitalWrite(12,HIGH); digitalWrite(9,HIGH); digitalWrite(10,LOW); digitalWrite(11,LOW); } void back() // Backward function { digitalWrite(11,HIGH); digitalWrite(10,HIGH); digitalWrite(7,LOW); digitalWrite(5,LOW); } void left() //LEFT function { digitalWrite(12,HIGH); digitalWrite(11,LOW); digitalWrite(10,LOW); digitalWrite(9,LOW); } void right() // Right function { digitalWrite(12,LOW); digitalWrite(9,HIGH); digitalWrite(11,LOW); digitalWrite(9,LOW); } void stops() // Robot STops { digitalWrite(12,LOW); digitalWrite(11,LOW); digitalWrite(10,LOW); digitalWrite(9,LOW); } |
Procedure to set Arduino Bluetooth Controller Apps.
Download and Install Arduino Bluetooth controller Apps
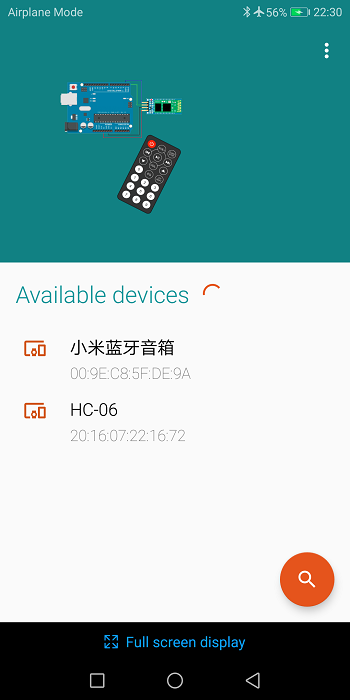
Turn on the Bluetooth and search for HC-06.
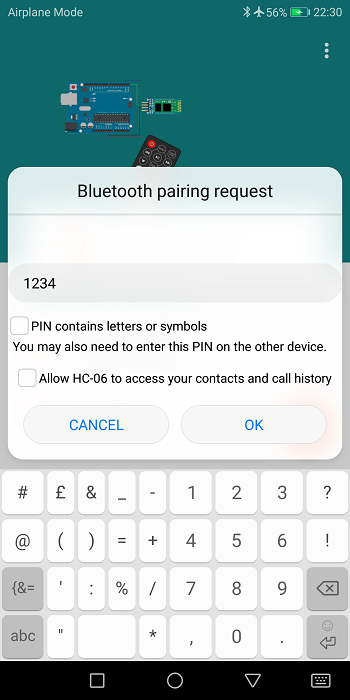
Pair with HC-05 and enter pin 1234
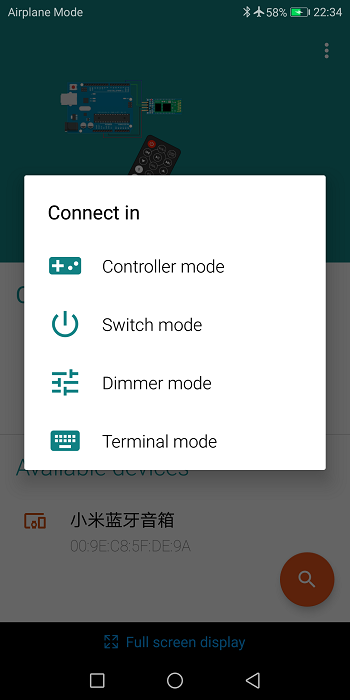
Click on HC-06 and after that click on controller mode.
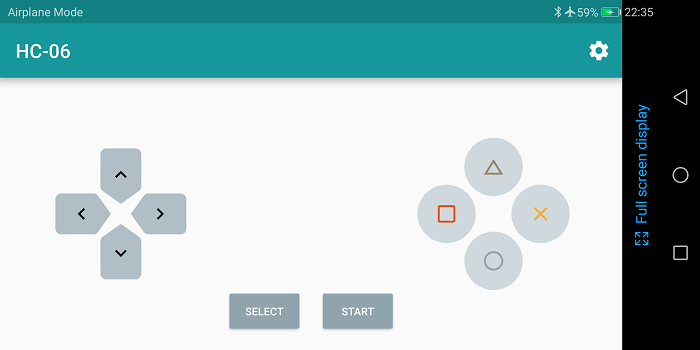
You will see the control bottom window as shown below
Now click on the setting icon and then put the assigned value as shown in the figure below
After setting go back and your remote becomes ready for use.
