Today in this article we will be going to show you “How to configure Arduino IDE for Node MCU” and also show you how to solve the uploading problem in NODE MCU. By default, we cannot program Node MCU using Arduino IDE, we have to configure our IDE. Here, we will show how to configure Arduino IDE for Node MCU step-wise. At first, let’s see what is Node MCU.
Node MCU is an open-source development kit like Arduino board, it is a prototyping model which helps hobbyist and engineers. Node MCU is preferred over Arduino for IoT projects because it includes ESP8266 Wi-Fi SOC. For mode details about Node MCU please refer to Wikipedia Page.
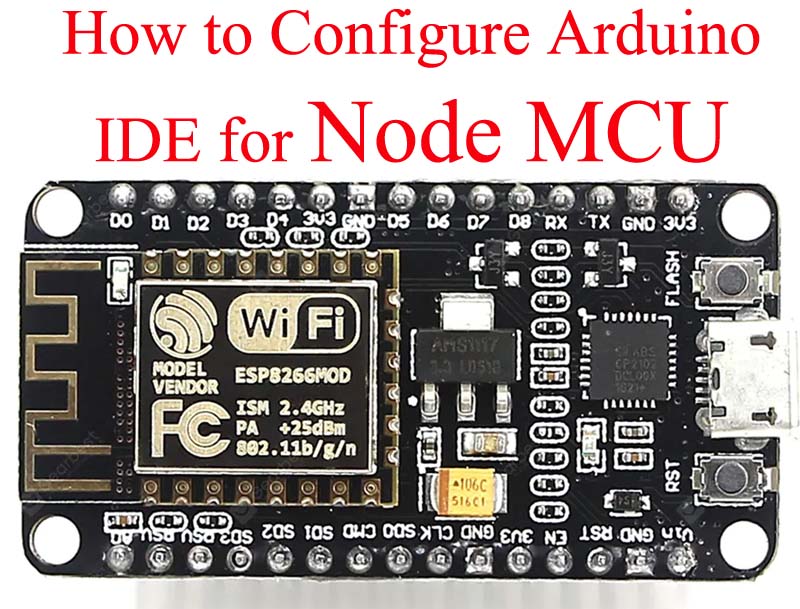 Figure 1: Node MCU
Configure Arduino IDE for Node MCU
Step 1: Open your Arduino IDE, click on the File tab and the Preference. (File>Preference). Note: You can also open it by pressing Ctrl +, (Comma).
Step 2: A new popup window of Preference will appear. There you will see Additional Board Manager URLs: “http://arduino.esp8266.com/stable/package_esp8266com_index.json”. There you have to enter the following URL (without comma) as shown in the figure below and then press OK.
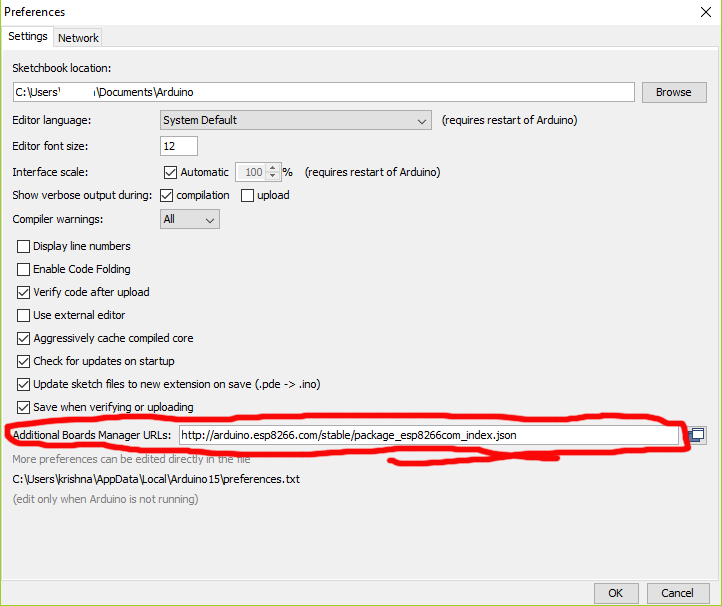 Figure 2: Adding URL in Additional Board Manager
Step 3: Now, go to Tools>Board>Board Manager
Step 4: A Board Manager window will appear, search for esp8266. A library esp8266 by the ESP8266 community appears. Now click on Install and wait for the library to install.
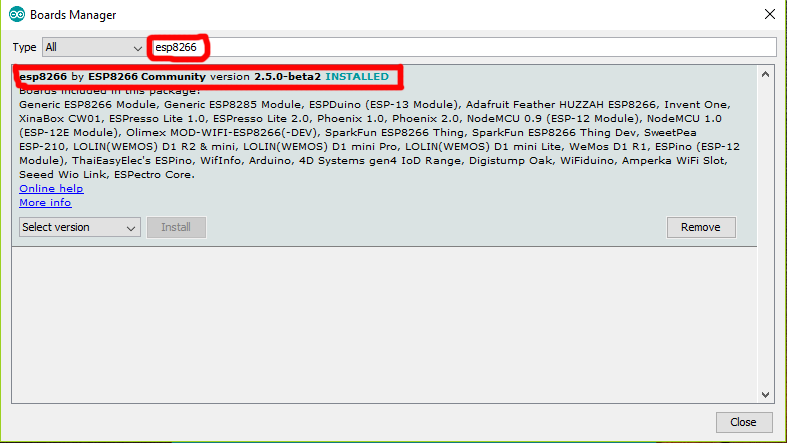 Figure 3: Installing ESP8266 Board
Step 5: Now it’s time to select board (Node MCU), for that go to Tools>Board and then select Node MCU 1.0 (ES2-12E) by scrolling down as shown in the figure below.
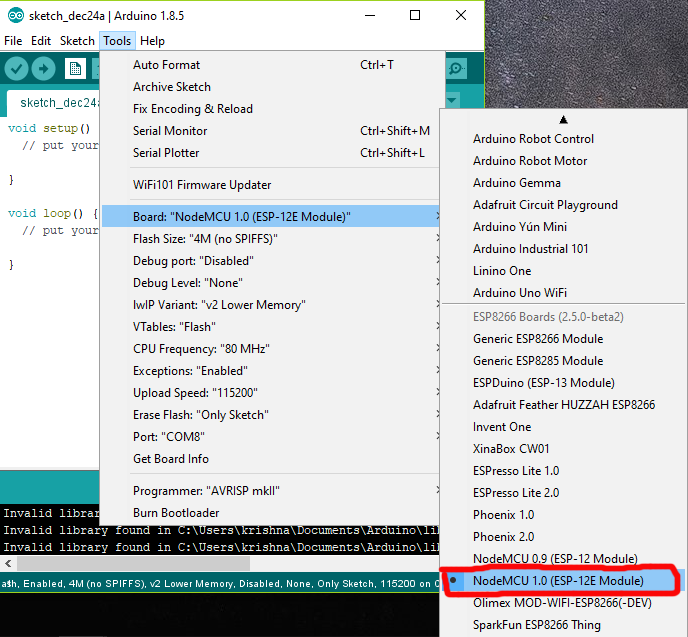 Figure 4: Selecting NodeMCU Board
Step 6: Almost done, now you have to select the Erase Flash-type for that go to Tools>Erase Flash and then select “Sketch + Wi-Fi Setting”.
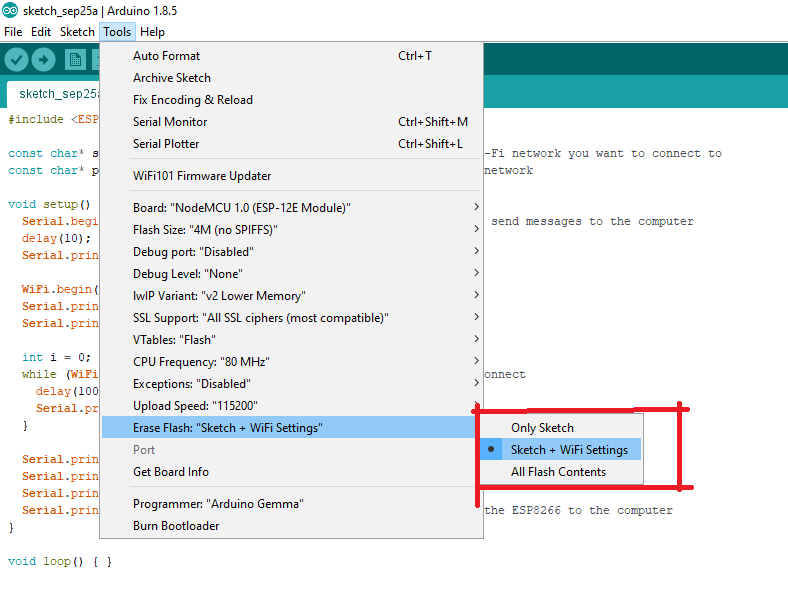
Figure 5: Selection of Erase Flash
All done now your Arduino IDE is ready to program Node MCU.
Check out different project build using Node MCU posted in bestengineeringprojects.com.