In this tutorial, you will learn how to make your relay switch circuit for Arduino in a few easy steps. We often see many electronics hobbyists especially Arduino users buy expensive relay modules instead of building their own. The general price of the relay module found in the market is about $2 but you can make your own for less than $0.70.
In the tutorial Relay Switch circuit for Arduino, you will learn
- Relay and Operating principle
- Pin Identification of Relay
- Component value calculation and choosing the best for your design.
- Build your relay switch circuit as per your requirement
So, let start with the topic Introduction to relay and its operating principle.
What is Relay? | How to Make Relay Switch Circuit
A relay is a device by which electric current flowing in one circuit can open or close a second circuit i.e. switch the current ON or OFF in the second circuit.
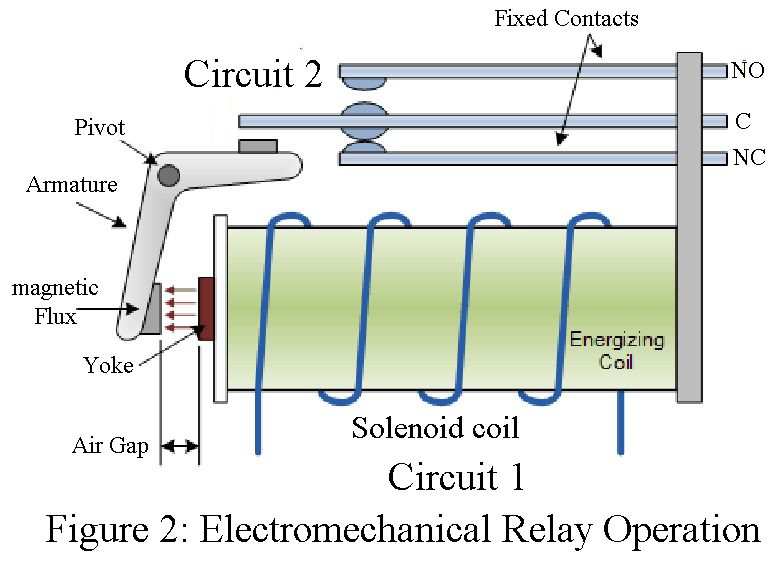
Working of the electromagnetic relay:
The operating circuit (circuit 1), see figure 1, is connected to a solenoid coil wound round iron core. A current in the coil forms an electromagnetic which attracts the soft-iron armature. This brings the contact point together, circuit 2 is closed and current flows. When circuit 1 is switched off the steel spring returns the armature to the open position and the current in circuit 2 is switched off.
Pin Identification of Relay
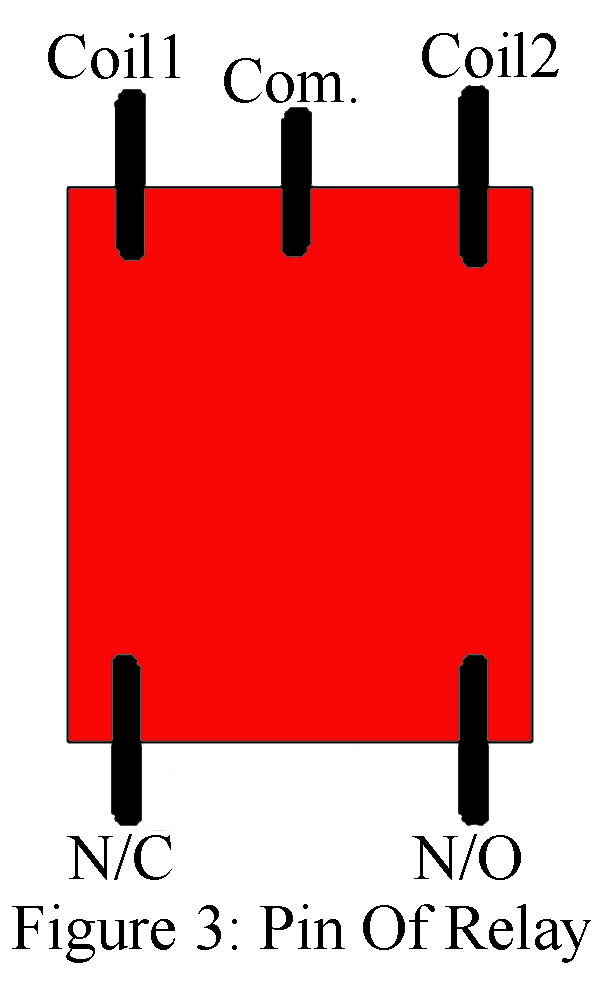
Normally, the relay has 5 terminals out of which two terminals are of coils, a common terminal, a Normally closed terminal, and a Normally Open terminal.
Follow the steps to identify the relay pins
- Take a multimeter and adjust it to resistance measurement mode (usually in 2K mode).
- If you see, the five-pin is arranged in two columns. One column consists of 3 pins whereas another consists of 2 pins. The two-coil pin and a common pin are situated on one side as shown in the figure below. The pin which lies in the center is a common pin and the two side pins are coil pins.
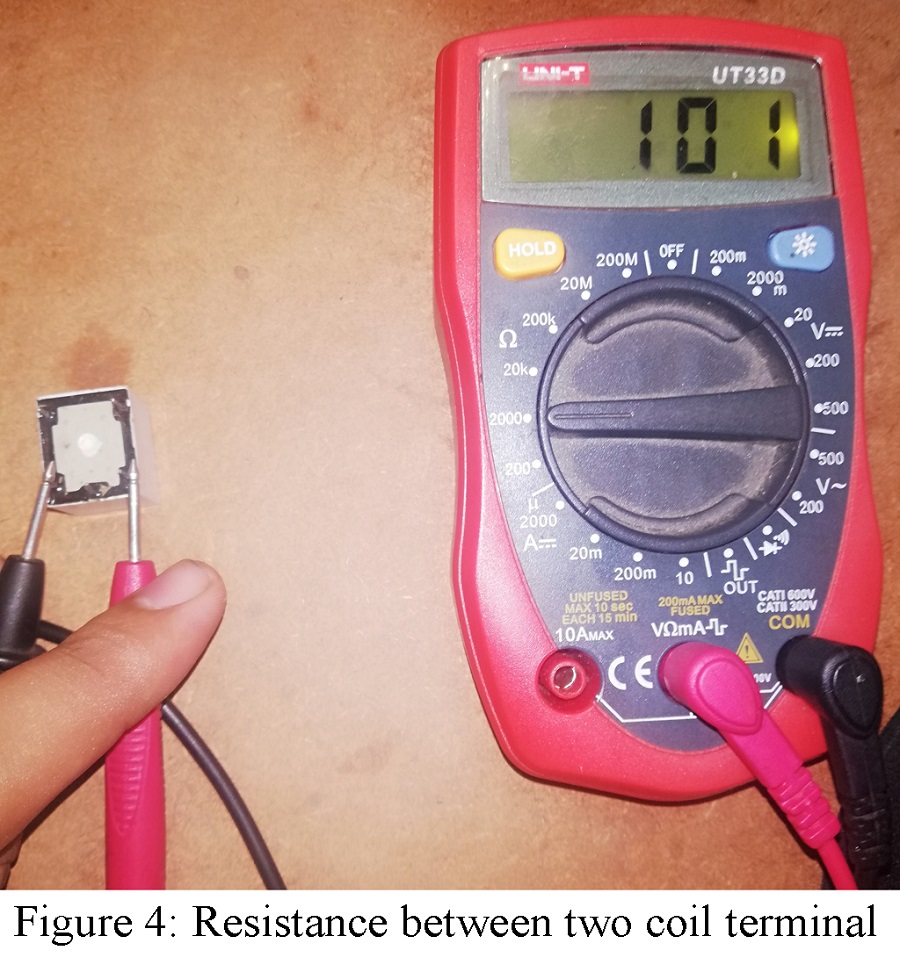
- You can also identify the coils pin using a multimeter. The wire used in coils has fixed resistance in the range of a few 100’s ohms. Now simply check the resistance of two side terminals of the relay (the side having three terminals), the resistance lies between 100-ohms to 500-ohm. As we know that the coil has no polarities, it is not a compulsion to identify the Vcc and GND pin.
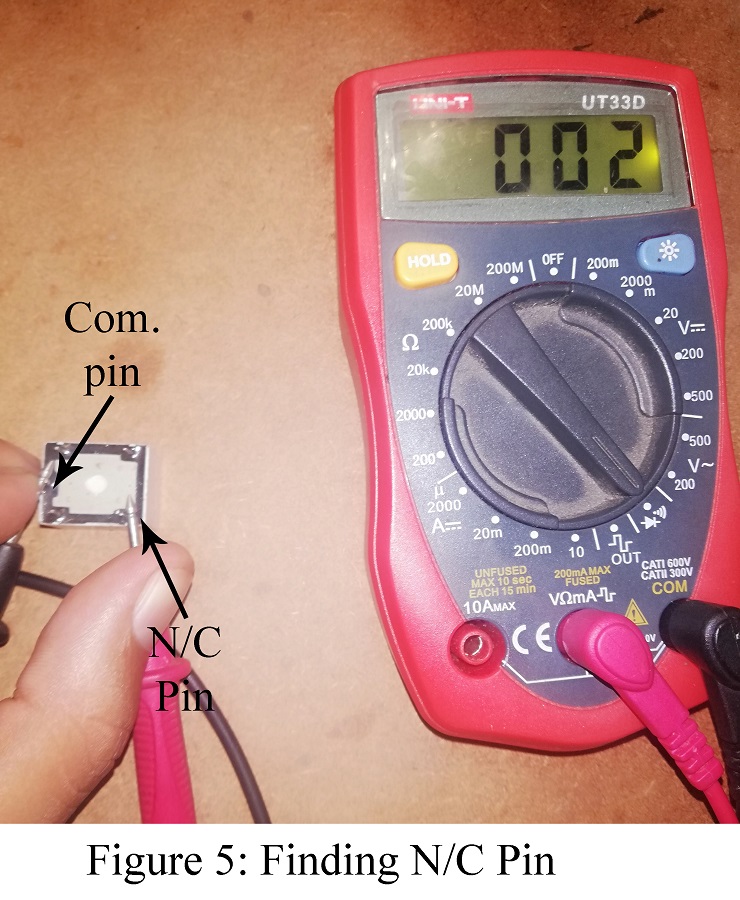
- In this step, we will identify common and Normally Closed (NC) pins of the relay. Generally, the terminal between the coil terminal is referred to as a common pin so we just have to identify the NC pin. Keep the multimeter in continuity test mode and check the continuity between the common pin and other than the coil pin. If the multimeter sounds up (i.e. wire is connected), that another pin is NC terminal.
- The fifth pin is NO terminal
Now it’s time to design the switching circuit
Before starting to design a relay switching circuit, let’s find calculate the parameter of the circuit like current resistance, etc.
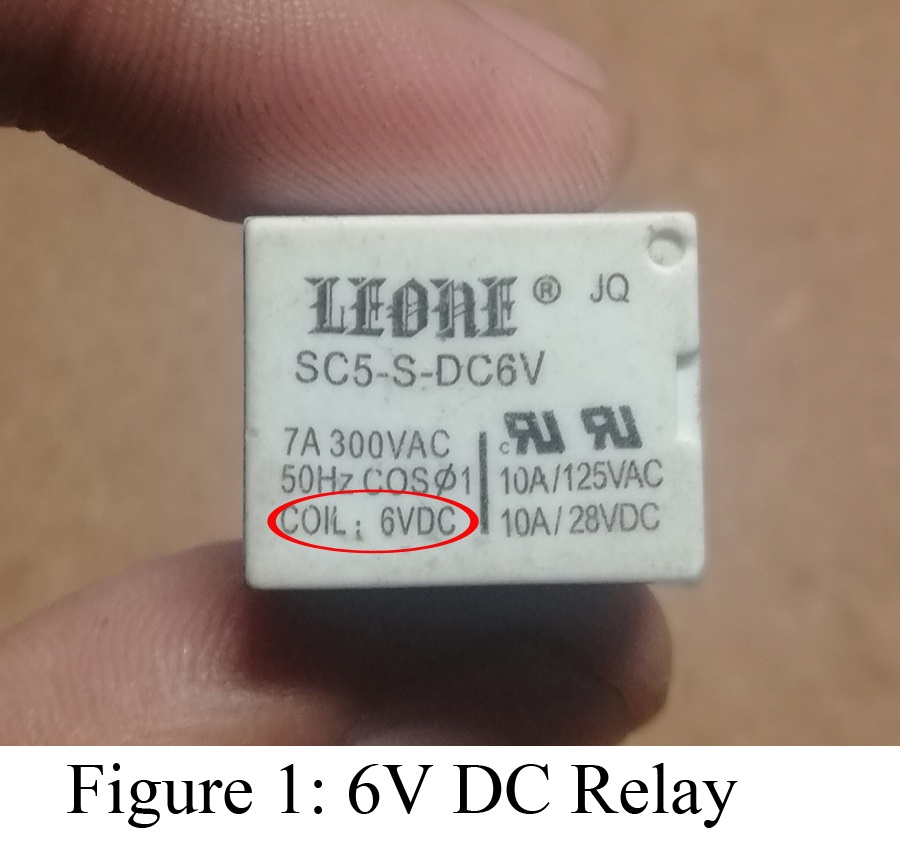
Generally, you will find the different parameters of the relay like coil voltage, coil resistance, etc. on the relay itself. But sometimes coil resistance is not given (as shown in figure 1), in that case, we have to measure the resistance between two terminals of the coil.
In my case multimeter shows the resistance of 102-ohms (figure 4) but for easy we take 100-ohms for calculation.
Coil resistance
Coil rated voltage
By using Ohm’s law, we can calculate current required to energized the relay coil
As we know that pin of arduino or any microcontroller cannot handle current more then 40 mA thus, we have to design a simple switch circuit.
Switching Circuit:
The relay switch circuit is shown in figure 6. A transistor with a collector current (IC) bigger than the above-calculated value (60mA), is used in a switching circuit.
Now before discussing the working of the switching circuit let’s first calculate the value of the base resistor.
The transistor I decide to use is BC548 but you can use any general-purpose transistor-like BC47 or 2N2222 etc. according to the availability.
The hfe of transistor BC 548 is 75 (according to the datasheet).
The collector current (IC) = 60mA (Calculated previously)
We know that
So, base current (Ib) can be calculated as;
A minimum current of 0.8mA at the base of the transistor is required to drive the transistor in conducting stage.
The base of the transistor is connected to a signal source (digital pin of Arduino) whose output voltage is about +5V and current is about 40mA. The current of 40mA is enough to burn out the transistor thus we have to use a current limiting resistor.
Again using Ohm’s law, we can calculate the resistance must be kept between the signal source and base of the transistor.
(From arduino board)
(base current (Ib))
We know that
So, roughly we can use a resistor of about 5 to 6K-ohm
Working of Relay Switching Circuit
When the input voltage at the base is earthed (i.e. input of 0 volts). The transistor is reversed biased and no current flows. The collector current is zero, i.e. no voltage drops at the collector. The voltage at the terminal of coil 1 of the relay is the same as the voltage at coil 2 terminal of relay i.e. there is no potential difference that relay is de-energized.
If the input voltage is given (+5V from Arduino board), then there is the positive voltage applied to the base. If this is sufficiently high (say +5V), the transistor is bottomed and the collector voltage is effectively zero. Hence, the relay becomes energized.
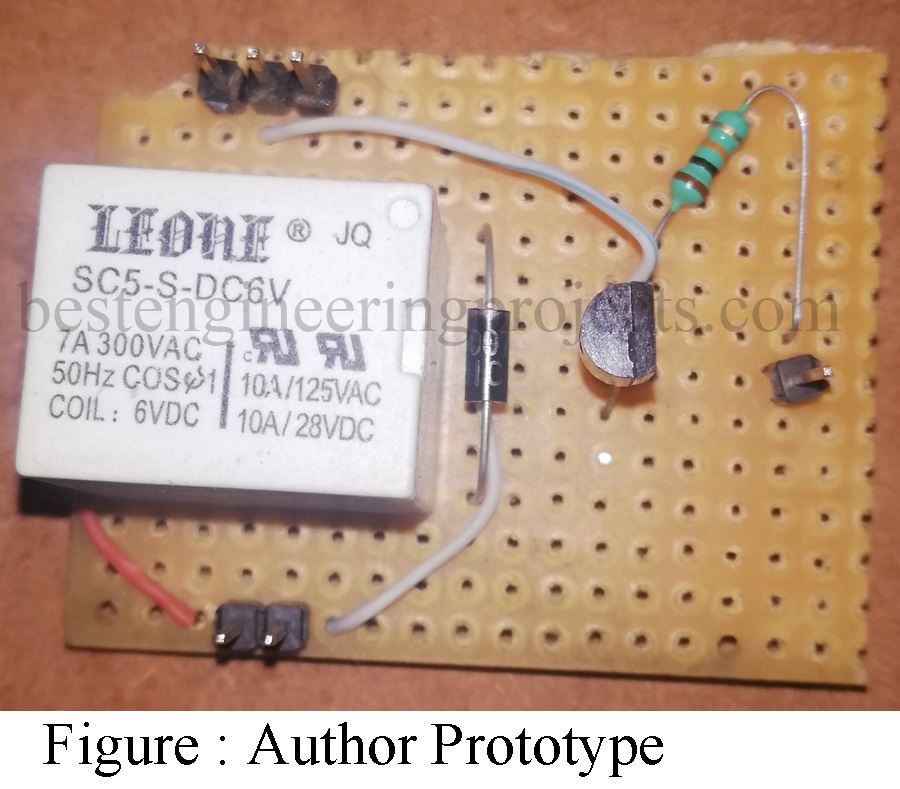
A protection diode also called fly-back diode must be connected between two coils terminal of the relay in reverse bias mode because a sudden change of voltage at the inductor causes the generation of high voltage. To make the flow of current till the current becomes zero, we are using this diode in the reverse direction as shown in the figure.
Component Required for Relay switching Circuit
R1 = 5K-ohm Resistor
T1 = BC548 (General Purpose NPN Silicon Transistor)
D1 = 1N4007 (Rectifier Diode)
RL1 = 6V, 100-ohm SPDT Relay
