In embedded systems, time information is monitored through logging and data storage. Most microcontrollers, including ESP32, can store sensor readings, logs, or configuration files on SD cards. In this tutorial, we will explain how to interface an SD card with the ESP32 microcontroller and display the card’s status along with volume on a 20×4 I2C LCD. We will then create a text file on the SD card and write some data.
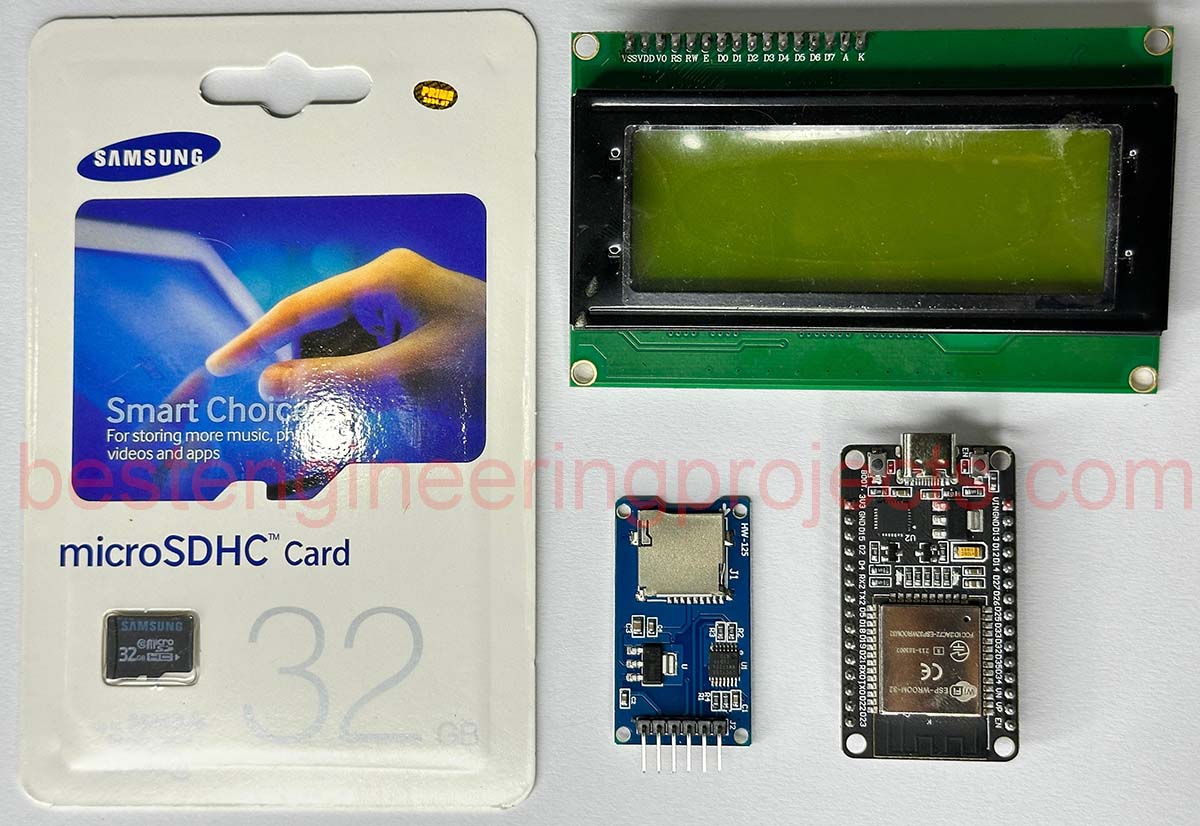
Figure 1: Components of esp32 and SD card Interfacing
Hardware Components Required
- ESP32 development board
- SD card module
- SD card
- 20×4 I2C LCD
Libraries Required:
- SD.h
- Wire
- LiquidCrystal_I2C
Preparing SD Card
Before interfacing the SD card with ESP32, it is essential to ensure the card is formatted as FAT32. This ensures that the card can be read and written using the ESP32’s file system library.
Formatting the SD Card
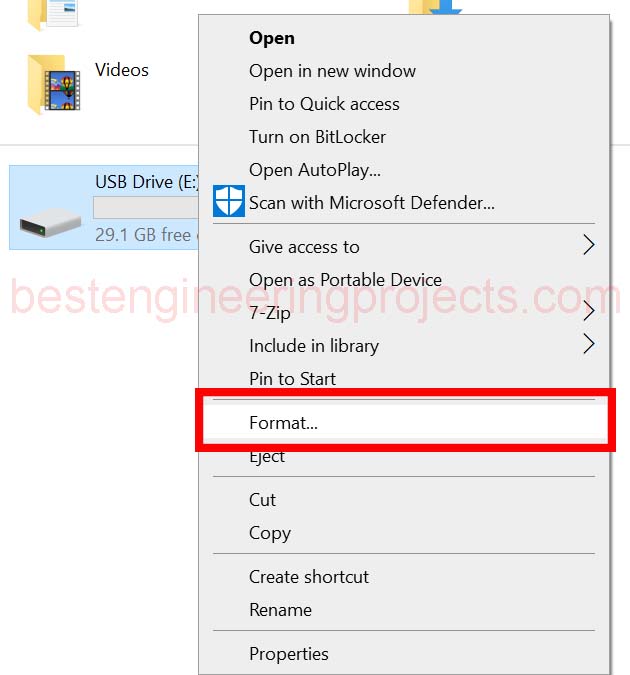
- Place the SD card in your computer via an SD card reader.
- Right-click on SD Card and click on Format.
 Figure 2: SD Card Format Menu
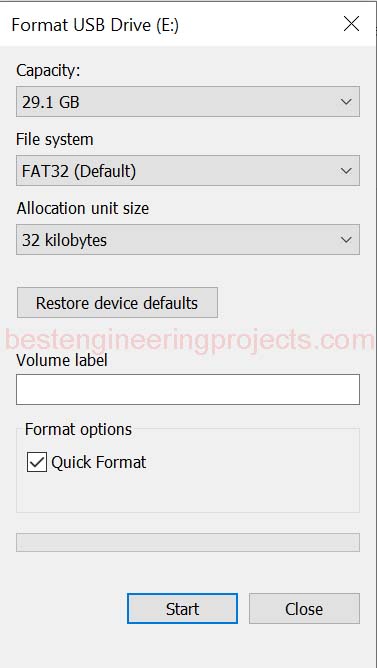
 - A window for formatting will appear there. Select FAT32 and click on start.
 Figure 3: SD Card Format in FAT32
 - After Format, a window will appear with the message “Format complete.”
 Figure 4: SD Card Format Complete

Circuit Diagram SD Card Interfacing with ESP32
The connections should not be made without ensuring that the logic levels of the SD card module and the I2C LCD are compatible with the ESP32, which operates at 3.3V.
Connection of ESP32 with SD card
| S.N. | SD Card Module Pins | ESP32 Pins |
| 1 | CS (Chip Select) | GPIO 5 |
| 2 | MOSI (Master Out Slave In) | GPIO 23 |
| 3 | MISO (Master In Slave Out) | GPIO 19 |
| 4 | CLK (Clock) | GPIO 18 |
| 5 | Vcc | Vin |
| 6 | GND | GND |
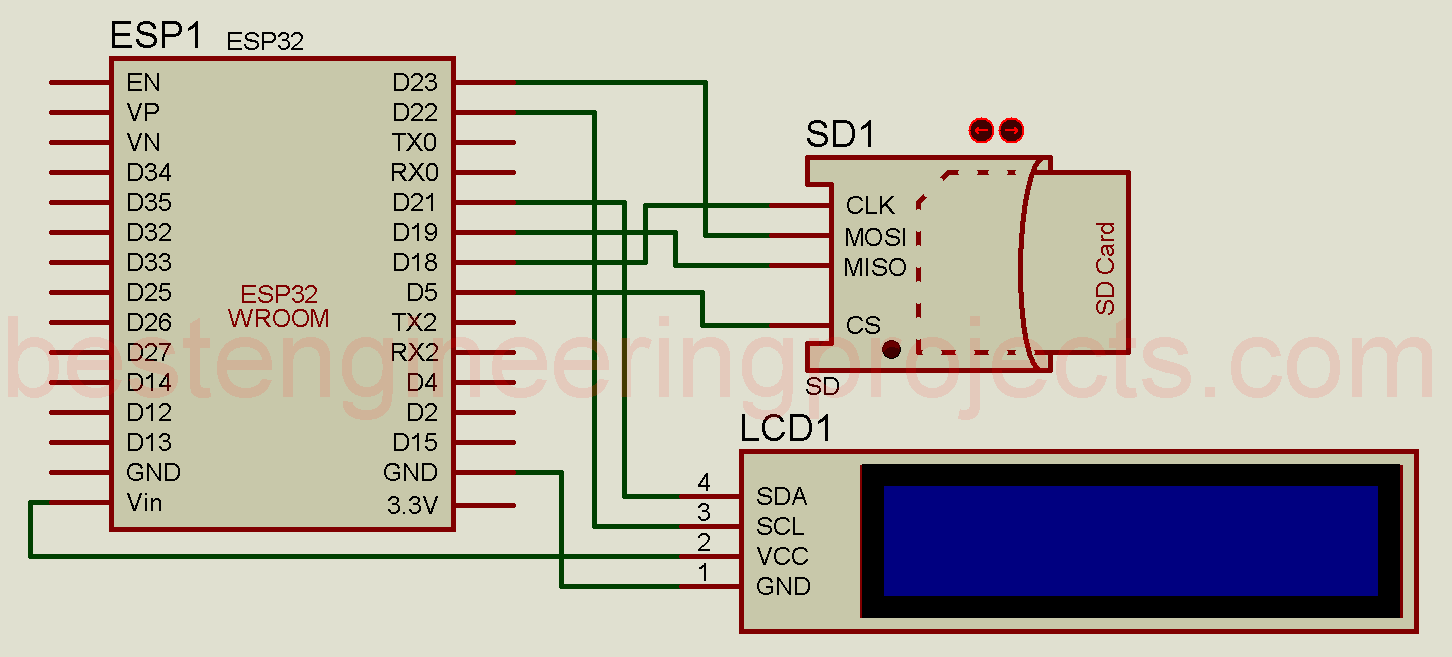
Figure 5: Circuit Diagram SD Card Interfacing with ESP32
Software Code:
|
1 2 3 4 5 6 7 8 9 10 11 12 13 14 15 16 17 18 19 20 21 22 23 24 25 26 27 28 29 30 31 32 33 34 35 36 37 38 39 40 41 42 43 44 45 46 47 48 49 50 51 52 53 54 55 56 57 58 59 60 61 62 63 64 65 66 67 68 69 70 71 72 73 74 75 76 77 78 |
#include <Wire.h> #include <LiquidCrystal_I2C.h> #include <SD.h> // Define the Chip Select pin for the SD card const int chipSelect = 5; // Initialize the LCD object for the I2C address 0x27, with a 20x4 display LiquidCrystal_I2C lcd(0x27, 20, 4); void setup() { // Begin serial communication at a baud rate of 115200 Serial.begin(115200); // Initialize the LCD lcd.init(); lcd.backlight(); // Turn on the LCD backlight // Display initial message lcd.setCursor(0, 0); lcd.print("Initializing..."); // Initialize the SD card if (!SD.begin(chipSelect)) { lcd.setCursor(0, 0); lcd.print("SD Card Failed"); // Show error message Serial.println("SD Card Initialization Failed"); return; // Stop the program if SD initialization fails } // SD card initialized successfully lcd.setCursor(0, 0); lcd.print("SD Card Present"); Serial.println("SD Card Initialized"); // Get the SD card size uint32_t cardSize = SD.cardSize() / (1024 * 1024); // Convert size to MB lcd.setCursor(0, 1); lcd.print("Size: "); lcd.print(cardSize); lcd.print(" MB"); // Calculate the used space on the SD card uint32_t usedSpace = (cardSize - SD.usedBytes() / (1024 * 1024)); lcd.setCursor(0, 2); lcd.print("Used: "); lcd.print(usedSpace); lcd.print(" MB"); // Optionally, show free space uint32_t freeSpace = cardSize - usedSpace; lcd.setCursor(0, 3); lcd.print("Free: "); lcd.print(freeSpace); lcd.print(" MB"); // Create and open the file on the SD card File myFile = SD.open("/bestengineeringprojects.txt", FILE_WRITE); // Check if the file opened successfully if (myFile) { Serial.println("Writing to bestengineeringprojects.txt..."); myFile.println("www.bestengineeringprojects.com"); // Write the text myFile.close(); // Close the file Serial.println("Done writing."); lcd.setCursor(0, 3); lcd.print("File Written OK "); } else { // If the file didn't open, show an error Serial.println("Error opening bestengineeringprojects.txt"); lcd.setCursor(0, 3); lcd.print("File Write Error"); } } void loop() { // Nothing to do in the loop for this example } |
Code Explanation
The program will:
Initialize the SD card: It checks whether or not it is correctly inserted and if it is accessible.
Display “SD Card Present” or “SD Card Failed” to indicate the card’s presence on the LCD.
Show the SD card’s volume: Display the SD card’s total size.
This sketch will create a text file on the SD card and write data.
Creating the File and Writing on It: Once the SD card is initialized successfully, a file named bestengineeringprojects.txt is created (opened if it exists) by SD.open() The URL www.bestengineeringprojects.com is written to the file.
The file is then closed to save the data written in it properly.
Error Handling:
If the file is not opened, the LCD will display “File Write Error,” sending an error message regarding file manipulation.
Show Status of the Write:
If the file were successfully written, the LCD would display “File Written OK.”
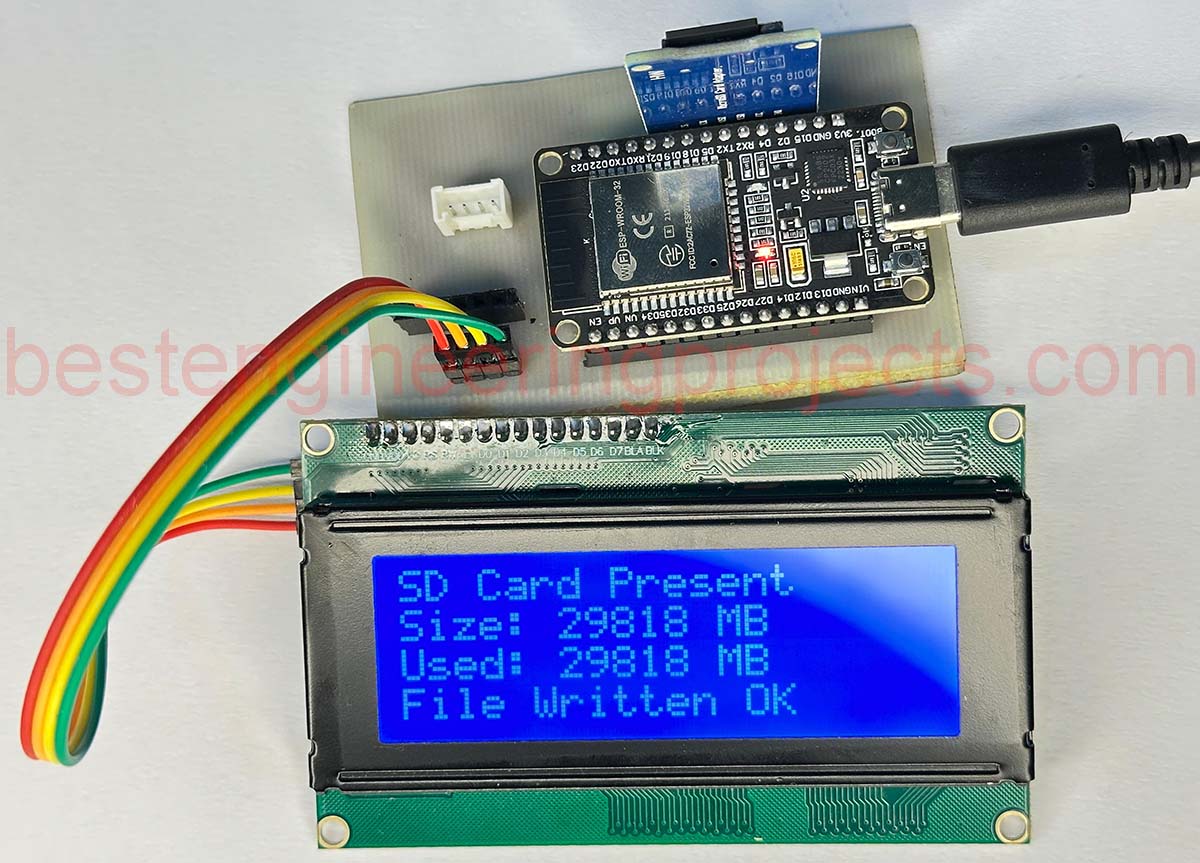
Figure 6: Author Prototype of ESP32 and SD Card Interfacing
Troubleshooting and Testing
SD Card Initialization Failed:
- Check if the connections are made correctly.
- Whether the formatting of the SD card has been done with FAT32.
- Check wiring for appropriate voltage level.
I2C LCD Not Operating:
- Recheck the LCD’s I2C address; if necessary, use an I2C scanner to find the correct address.
- Check connections between the SDA and SCL of the LCD for tightness.
Conclusion
In this tutorial, we have interfaced an SD card with the ESP32 microcontroller and displayed its status and volume information on a 20×4 I2C LCD. Furthermore, we have created a text file and written data in it. Proper SD card formatting beforehand will ensure that the file system operations run smoothly. This can be a good starting point for data logging and embedded file management projects.